SUPER BLINGY GLITTER BOMB AWESOMENESS!
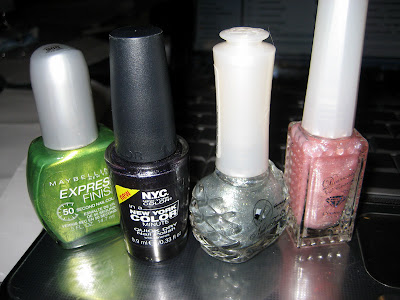
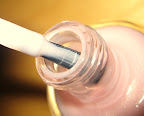
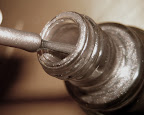
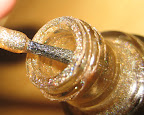
I'm so in love with the new polishes I ordered from Glitzology. They're gorgeous! Look at them! I could stare at these all day (*_*)
Full sized bottles I picked up: Blue Lagoon, My Viking Boyfriend (no bars), All or Nothing, and Cotton Candy
Mini sized bottles I picked up: Neapolitan, Diamonds & Pearls, Nebula, As You Wish
The first polish I tried from this set was Cotton Candy which I wore over Seche Rose. It's so cute! The pink is very delicate but sugary and fun like getting cotton candy at a carnival! Even my mom liked it and she doesn't like pink polish nor does she like glitter. And this has plenty of both!
Showing posts with label pink. Show all posts
Monday, November 19, 2012
Wednesday, November 14, 2012
Galaxy Nails!
Okay so I'd seen a few tutorials and awesome examples of this technique floating around the web. And I couldn't put it off any longer... I HAD to try it.
Everyone that posted a tutorial said that it was a piece of cake. Easiest thing ever. They weren't too far off the mark on that. I would say that it's easy because it's just randomly sponging a couple of paints onto your nails. But I would also say that consideration for aesthetics comes into play on this. I've seen a couple of examples out there where the galaxy "print" looks too even. That might be my personal preference to see some asymmetry and randomness in a design like this. It's ethereal and just like the cosmos, it's all over the place. I tried to scatter my colors and it sort of worked.
The only other thing I noticed while I was doing this was how unlike a galaxy it looked really until I put the glitter coat on. I didn't want to get my hands messy with the toothbrush splatter technique although it does look awesome like that. So I went with the easy glitter method. But once I put that glitter on, it just BAM! looked like the galaxy. (I think I was channeling Alexis Mateo there...) I even got these odd clumpy polish circles from the sponge dabbing but it worked out fine!
Oh.. another note. I started with a wedge makeup sponge with perfect cut edges. By the end, I'd torn it into smaller pieces (like in Coewless's tutorial) and put the paint on the torn parts to sponge on. Doing that gave a nicer more random sponging pattern.
I REALLY DO love this style. I keep looking at my nails (dangerous while driving) and thinking to myself that it really does look like images of the galaxy on my nails.
Everyone that posted a tutorial said that it was a piece of cake. Easiest thing ever. They weren't too far off the mark on that. I would say that it's easy because it's just randomly sponging a couple of paints onto your nails. But I would also say that consideration for aesthetics comes into play on this. I've seen a couple of examples out there where the galaxy "print" looks too even. That might be my personal preference to see some asymmetry and randomness in a design like this. It's ethereal and just like the cosmos, it's all over the place. I tried to scatter my colors and it sort of worked.
The only other thing I noticed while I was doing this was how unlike a galaxy it looked really until I put the glitter coat on. I didn't want to get my hands messy with the toothbrush splatter technique although it does look awesome like that. So I went with the easy glitter method. But once I put that glitter on, it just BAM! looked like the galaxy. (I think I was channeling Alexis Mateo there...) I even got these odd clumpy polish circles from the sponge dabbing but it worked out fine!
Oh.. another note. I started with a wedge makeup sponge with perfect cut edges. By the end, I'd torn it into smaller pieces (like in Coewless's tutorial) and put the paint on the torn parts to sponge on. Doing that gave a nicer more random sponging pattern.
I REALLY DO love this style. I keep looking at my nails (dangerous while driving) and thinking to myself that it really does look like images of the galaxy on my nails.
Polishes:
- NYX Girls - Robotic
- Orly - It's up to Blue
- China Glaze - Electric Beat
- China Glaze - Re-Fresh Mint
- Essie - Castaway
- Color Club - Worth the Risque
- China Glaze - Fairy Tale
- Seche Vite Top Coat
Tutorials and Posts about Galaxy Nails:
- Polish and Pearls: How To - Galaxy Nails (tutorial)
- Coewless Polish: NOTD – Green/blue Galaxy (+ tutorial!)
Tags:
blue,
China Glaze,
Color Club,
essie,
galaxy,
glitter,
Orly,
pink,
silver,
teal
Friday, November 9, 2012
Indie Polish: Hit Polish
Yeah. Hit Polish's glitters don't get old! They're so so so cute and sparkly!
This is Hit Polish Retro Chic over OPI Tickle My France-y.
You can pick up her polishes at the Hit Polish Etsy store. She's super easy to work with and shipping was awesomely fast!
This is Hit Polish Retro Chic over OPI Tickle My France-y.
You can pick up her polishes at the Hit Polish Etsy store. She's super easy to work with and shipping was awesomely fast!
App I used: Rakugacute
Tags:
black,
glitter,
Hit Polish,
indie,
OPI,
pink,
rakugacute
Friday, November 2, 2012
Hit Polish - Shockwave
There are so many blogs out there that are AWESOMELY FULL of nail polish posts but I hardly update so I'm not that awesome :/
In any case, here's a quick post on a new polish I picked up this week from an online shop called Hit Polish. SO SO SO SOOOOOO~ many CUTE and GLITTERY polishes! I went a little berserk and bought 8 minis for myself >.< (that's my guilty face)
Lookie!
In any case, here's a quick post on a new polish I picked up this week from an online shop called Hit Polish. SO SO SO SOOOOOO~ many CUTE and GLITTERY polishes! I went a little berserk and bought 8 minis for myself >.< (that's my guilty face)
Lookie!
Pretty darn cute! I'm wearing Hit Polish's Shockwave (1 coat) over Ruby Wing Myth (which changes color in UV light to a mauve color).
Tags:
black,
glitter,
Hit Polish,
indie,
Myth,
pink,
purple,
rakugacute,
Ruby Wing,
Shockwave,
speckled
Tuesday, June 12, 2012
Ombre Nails
Big trend these days!
Here's the tutorial I found from thebeautydepartment.com
Here's my efforts at ombre nails:
Here's the tutorial I found from thebeautydepartment.com
Here's my efforts at ombre nails:
Wednesday, May 4, 2011
backlog: Mar 2009
Wednesday, January 19, 2011
Nino helped with this one
My boyfriend often laughs at/with me (but it's mostly at me) b/c I love to do my nails. He says "It's just cute that you are so dedicated to doing your nails." In truth, I love doing my nails but my life doesn't revolve around doing them (is that some sort of nail blog blasphemy or what?). So even thought I do them as often as I can, sometimes I just get lazy or feel uninspired. So lately, my nails have been half-assed b/c I don't feel like getting complicated.
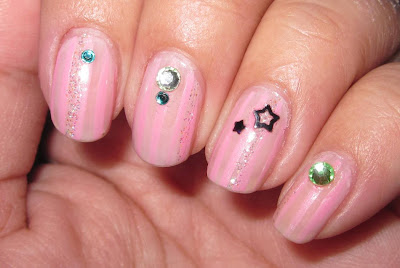
Here's a set I did while Nino was on vacation and visiting me. I asked him what color: he said "pink". I asked him what kind of design: he said "stripes. Then I said the set looked boring, so I added glitter (my own decision!) then I asked how it looked: he said "needs something... more." I let him choose the gems! and I knew I wanted stars. And in the end, the result is what you see below.
The base pink and stripe design I've used before: Disneyland Is Cute
polish:
+ OPI's Tutti Frutti Tonga
+ light pink striper by Art Club
+ irridescent glitter striper by Art Club
extras:
+ Art Club nail art sprinkles in black stars
+ Swarovski flatback rhinestones (7ss Jonquil, 5ss Crysolite, 5ss Blue Zircon)
Here's a set I did while Nino was on vacation and visiting me. I asked him what color: he said "pink". I asked him what kind of design: he said "stripes. Then I said the set looked boring, so I added glitter (my own decision!) then I asked how it looked: he said "needs something... more." I let him choose the gems! and I knew I wanted stars. And in the end, the result is what you see below.
The base pink and stripe design I've used before: Disneyland Is Cute
polish:
+ OPI's Tutti Frutti Tonga
+ light pink striper by Art Club
+ irridescent glitter striper by Art Club
extras:
+ Art Club nail art sprinkles in black stars
+ Swarovski flatback rhinestones (7ss Jonquil, 5ss Crysolite, 5ss Blue Zircon)
Sunday, September 12, 2010
caught in a net
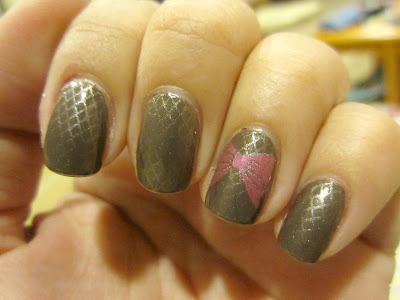
I'm not huge on darker colors, but I'm getting used to it. Especially browns. I often feel like my skin looks weird. But I got tons of compliments on the color.

color: China Glaze Ingrid (Vintage 2010 collection)
konad plates: m69 + m71
konaded color: China Glaze Cords (Retro Diva collection) for the net pattern on m69 + Konad Special Polish Psyche Pink for the bow on m71
color: China Glaze Ingrid (Vintage 2010 collection)
konad plates: m69 + m71
konaded color: China Glaze Cords (Retro Diva collection) for the net pattern on m69 + Konad Special Polish Psyche Pink for the bow on m71
Wednesday, June 9, 2010
playa del carmen 2010
Couldn't think of what to paint for my vacation coming up this weekend. gonna be with family and it'll be craziness! 17 of us in 3 villas at the Royal Haciendas! woohooo!
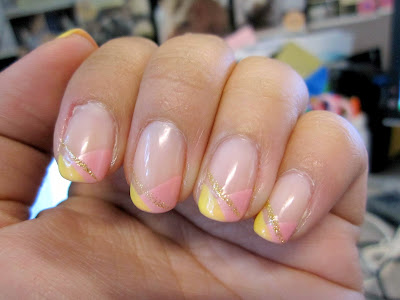
Wanted something that would be easy to manage (ex. no gems to fall off). This polish design started with metallic lime green and the same pastel yellow... but then it looked too Carnival-ish. So I went with the pink as it was a generally softer color. I actually chose to wear yellow nails for my last trip to Playa del Carmen with my family too. lol.
Man... I need a tan. :P

Base Color: a nude color from Orly... not sure what it's called. Might be "Sheer Nude"
Tip Color: OPI's Italian Love Affair, OPI's Banana Bandana
Striper: Gold glitter from Art Club (b/c the glitter was finer than Kiss's version of the gold glitter striper.
Wanted something that would be easy to manage (ex. no gems to fall off). This polish design started with metallic lime green and the same pastel yellow... but then it looked too Carnival-ish. So I went with the pink as it was a generally softer color. I actually chose to wear yellow nails for my last trip to Playa del Carmen with my family too. lol.
Man... I need a tan. :P
Base Color: a nude color from Orly... not sure what it's called. Might be "Sheer Nude"
Tip Color: OPI's Italian Love Affair, OPI's Banana Bandana
Striper: Gold glitter from Art Club (b/c the glitter was finer than Kiss's version of the gold glitter striper.
Thursday, March 11, 2010
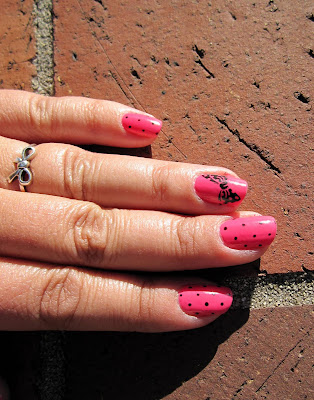
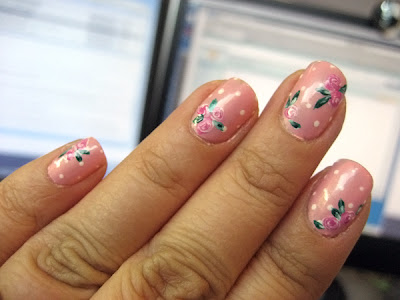
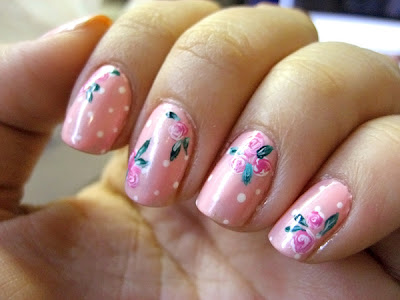
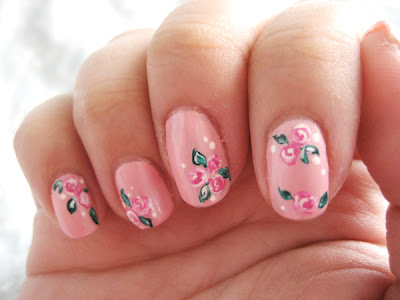
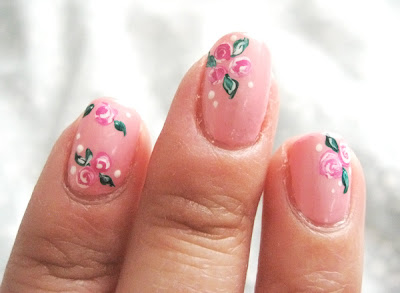
swirled roses v 1.1
Just like version 1.0 but with a bit of extra fun ^_^
♥ duration: 35 mins (2 episodes of Azumanga Daioh)
♥ colors/steps for polish:
▪ Orly Bonder
▪ base color: OPI's Italian Love Affair
▪ 2nd color over base coat: OPI's I'll Take The Cake (to soften the color)
▪ used small dotting tool to make evenly spaced white polka dot pattern
♥ colors/steps for flowers:
▪ reference post from swirled roses 1.0
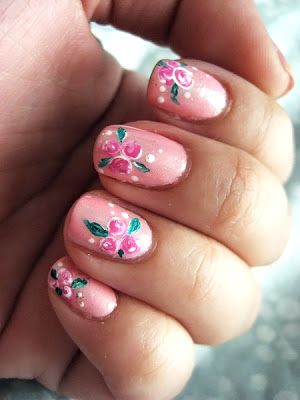
swirled roses v 1.0
♥ duration: 15-20 mins (not including polish time.. while watching Apollo do qualification rounds on TV)
♥ colors/steps for polish:
▪ Orly Bonder
▪ base color: OPI's Italian Love Affair
▪ in addition, on one hand I did a second color coat using Winmax Pink Diamond polish to give it a bit of snowy glitter.
▪ 1 drop of white acrylic craft paint using a dotting tool where I want the roses to be.
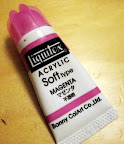
▪ 2 smaller drop of magenta acrylic paint in the middle of each white drop. (purchased the magenta paint ages ago at Mitsuwa near the makeup section)
▪ Use a thin brush to gently swirl (not mix) the paint together. I went in both directions (CW and CCW) and if necessary, added a tiny amount extra of white or magenta paint depending on how the flower was looking.
▪ I'd recommend doing each nail one at a time so the paint won't dry out when you're trying to swirl the paint.
▪ paint green leaves with any green acrylic craft paint. (I use the green in one of this kiddie sets that's all stuck together. (something like the paint included in these things). I've probably had those sets for years and since I rarely open them, they're still usable.
Wednesday, February 24, 2010
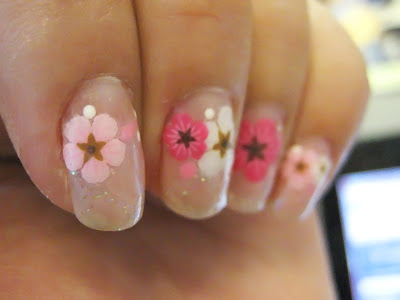
Fresh Flowers
Tuesday, February 16, 2010
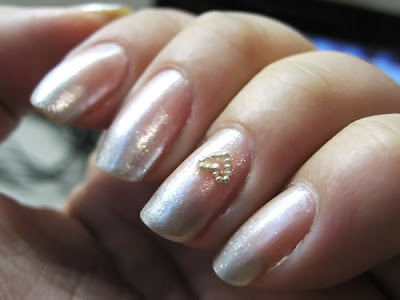
silver and pink gradient
This one was so subtle in color that I was afraid it'd be impossible to see in photos. I think you can see the gradient, but I guess the naked eye view is much better, in my opinion.
The silver gradient was made using a nice translucent silver color (Out Of This World) I picked up from Walgreens :) (Sinful Colors polishes are around $2!). I found a gal who swatched it in her blog: laquerlaine - towards the end of the entry. I did read in laquerlaine's entry that Sinful Colors' formula isn't good. Well.. it's $2 so that's to be expected I guess.. But on the other hand, this polish was perfect for what I wanted to do. Granted, I didn't plan on making the polish to appear 100% opaque so it worked out just fine for what I had in mind. Another comment was that it chipped immediately. In total, there were 8 thin coats of polish on my tips by the time I finished.. and I kept the polish on for an entire week or more without chipping or barely even a worn corner. I'm just in the habit of changing my polish/pattern around once a week. This set did really well for me. (Can I get off my soapbox now?)
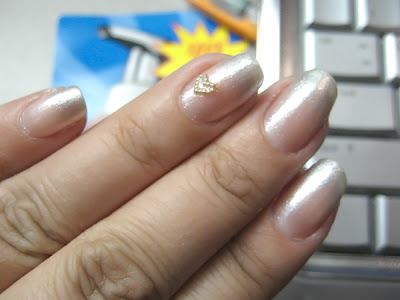
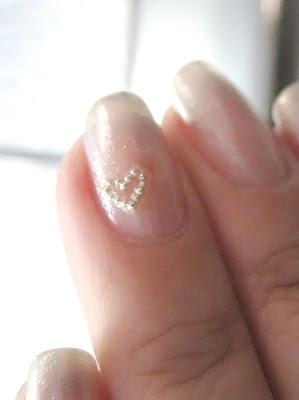
I hardly ever use bullion b/c to be honest, it's a pain in the arse to handle. It's tiny and you need to be patient enough to push them around to suit your desired shape. But it was cute for this and I figured 1 heart on each hand wasn't going to kill me :P
♥ duration: 40 mins
♥ colors/steps:
▪ Orly Bonder
▪ base color: OPI's Tutti Frutti Tonga + Winmax Diamond Nail Enamel #7 (pink diamond)
▪ tip gradient color: Sinful Colors' Out Of This World (4 thin, gradual coats) + Winmax Nail French #5 (french silver)
▪ Accessories: silver bullion from Vietnam. Don't ask me where I got those.. (about 5 yrs ago, my parents went back to VN and I asked them to just find some fun nail things and that's one of the items they returned with).
▪ Seche Vite on top
more photos:
below is a photo of the polishes I'd bought a few months ago. The pink on the far right is one of the base colors I used. And the silver (2nd from the right) is the last coat I used over the silver gradient.
Friday, February 5, 2010
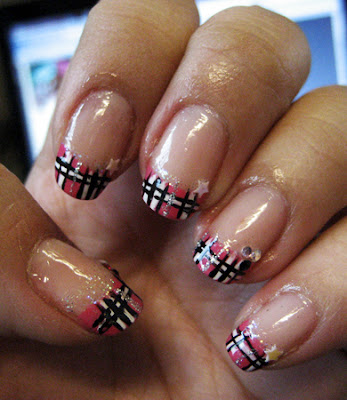
cherry pink plaid
A variation of Coral Plaid but with OPI's DC Cherry Blossom.
I still like this one a lot and get a lot of compliments on it.
I think my hand is pretty steady, but if you take your time, the lines will look fine. It doesn't have to be perfect.
And despite how busy the pattern seems, I didn't feel like it necessarily clashed with the things I was wearing.
This one lasted decently long. I wore it for a full week before changing it and wasn't that it was chipping either... I just wanted to change it up. ^_^
♥ duration: 40 mins
♥ colors/steps:
▪ Orly Bonder
▪ base color: Orly ... forgot what it's called. I'll check it later. Something neutral.
▪ tip color: OPI's DC Cherry Blossom
▪ Art Club's black striper first
▪ Art Club's white striper 2nd
▪ Kiss silver glitter striper vertically placed somewhere in between the spaced white lines
▪ Art Club's irridescent glitter striper under the french manicure tip.
▪ Corner accents: tiny plastic stars, randomly picked sets of 3 swarovski crystals (fuchsia, lt rose, rose, crystal ab, jet, crystal moonlight)
▪ top coat: Seche Vite
Thursday, February 4, 2010
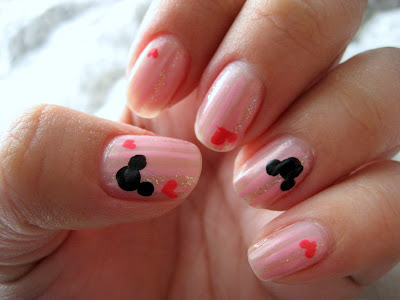
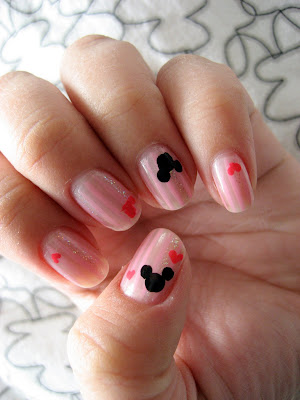
Disneyland is cute
See? Cutesy, huh?
I went with my honey to Disneyland a bit after Christmas. Good fun! There is something completely magical about Disneyland during the holidays. *eyes sparkle* ^_^
♥ duration: 30 mins
♥ colors/steps:
▪ Orly Bonder
▪ base color: OPI's Tutti Frutti Tonga
▪ light pink striper by Art Club
▪ randomly placed irridescent glitter stripes (Art Club) in between light pink stripes.
▪ brighter pink/orange striper polish from Art Club used with dotting tool to make hearts.
▪ Orly Liquid Vinyl polish used with dotting tool to make Mickeys
▪ top coat: Seche Vite
and 1 more photo:
Monday, December 7, 2009
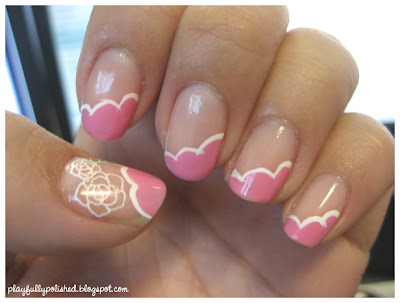
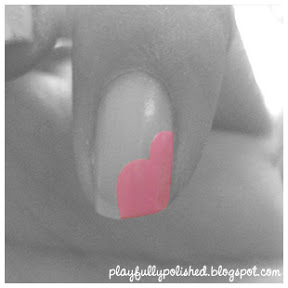
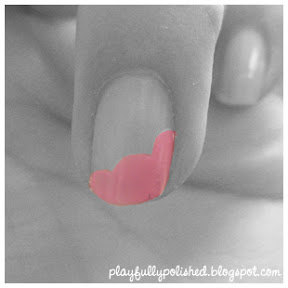
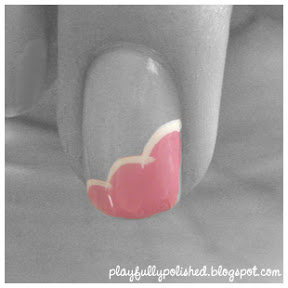
pink scallops - Nov 4, 2009
Got the idea for this one out of a Nail Up Mag. It was made to be a light blue sky (base color) and white scalloping to look like clouds. It was cute. :D I was still in pink mode when I did this back in November. :P ♥ duration:25 mins (really simple, really quick, and super cute)
♥ colors/steps:
Orly Bonder base coat, Essie Castaway (pink tips), Kiss white striper, stain glass style nail seals purchased through Rakuten, a nude polish from Orly (label came off) as the base to make my nails look clean, and Seche Vite for top coat.
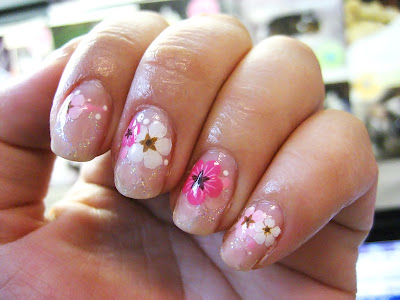
Below are the steps I took:
Friday, October 9, 2009
pink quarters
Another pink one! yes.. can't get enough of that pink I have (OPI's I'll Take The Cake). I was feeling softy and pinky again so this is what I came up with.
♥ duration: 25 mins (was probably watching Psych again)
♥ notes:
▪ I don't think I kept these on that long but they would have lasted a while.
▪ I used a larger gem this time because there was only 1 and it was almost in the middle of my nail.
▪ I designed these with quadrants in mind so here's a link to an image with numbered quadrants for reference.
♥ colors/steps:
▪ 1 coat Orly Bonder
▪ 2 coats OPI I'll Take The Cake
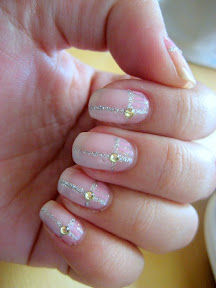
▪ 1 coat of a pearly white (a Winmax I picked up from Daiso)in 1 imaginary quadtrant of my nail. You have to kind of imagine where the lines will go to do this but I think if you don't stray too far out of the imaginary lines, you'll be fine. The glitter striper is forgiving :)
▪ drew 1 line of Kiss silver glitter striper vertically and 1 line horizontally across my nail following where I imagined I wanted to put my quadrants. You'll notice I have the crosspoint off center. so the vertical line is about 1/3 of the way into my nail instead of right in the middle. Just for variety :P And the horizontal line is placed slightly closer to my cuticle rather than right in the middle again.
▪ for kicks, I drew pink vertical pinstripes with Art Club's pastel pink striper in the quadrant (quadrant 4) opposite the pearly white quadrant (quadrant 2)
▪ in between the pink vertical stripes, I used Art Club's iridescent glitter striper to give it some sparkle.
▪ the final touch: 1 7ss Jonquil Swarovski Chrystal at the intersection of the silver glitter stripes adhered with Orly Bonder.
▪ 1 coat Seche Vite
Thursday, September 24, 2009
sweet sparkly pink
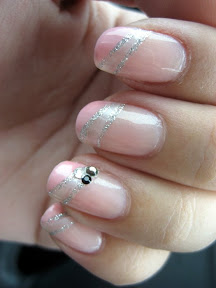
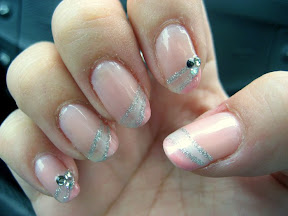
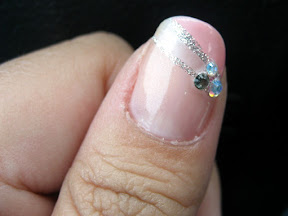
But you have no idea how much time it took me to figure out what I wanted to do. I knew I wanted to use a new nail polish but I after I'd put OPI's My Private Jet on 1 hand and tried a french tip in China Glaze's Cords... I decided my nails were too long for such a dark color. So I took that off. Then I repainted them in China Glaze's It's My Turn. And again, I wasn't feeling the color at all. So I took that off. I kept eyeing my pinks so I decided.. PINK IT IS!
♥ duration: 30 mins (not including the 2 other sets I painted before this one while watching Psych)
♥ notes:
▪ simple is best :D
▪ this was the result at the 3rd attempt at painting my nails last night. lol
▪ this is one of those times I was glad to have a variety of rhinestone colors. But I wish I had more variety in sizes. (my standard is 5ss)
♥ colors/steps:
▪ 1 coat Orly Bonder
▪ 2 coats OPI I'll Take The Cake
▪ 1 coat of pearly white polish (~70% opaque) from Daiso (brand: Winmax) in a line going diagonally across my nail (starting almost halfway down and going upwards towards the other side at ~ a 30 degree angle)
▪ 1 coat of Nailite Inc's Peach Schnapps (mixed with white and other pinks to make it more pinkish and less peachy(starting ~2mm higher than the pearly white layer and going upwards at ~ a 50 degree angle towards the other side)
▪ use Kiss Silver glitter striper to make lines where the 2 colors meet.
▪ 1 dab of Orly Bonder where I want to put the gems (in this case at the base of the white section.
▪ selected 3 gems in the same color range, 1 larger one and 2 smaller ones to place on the dab of Bonder. I used (in various groupings): 7ss Black Diamond, 5ss Crystal Moonlight, 7ss Crystal AB, 5ss Crystal AB, 5ss
Jet.
▪ 2 coats Seche Vite
Subscribe to:
Posts (Atom)