Showing posts with label silver. Show all posts

Wednesday, November 14, 2012

Galaxy Nails!

Okay so I'd seen a few tutorials and awesome examples of this technique floating around the web. And I couldn't put it off any longer... I HAD to try it.

Everyone that posted a tutorial said that it was a piece of cake. Easiest thing ever. They weren't too far off the mark on that. I would say that it's easy because it's just randomly sponging a couple of paints onto your nails. But I would also say that consideration for aesthetics comes into play on this. I've seen a couple of examples out there where the galaxy "print" looks too even. That might be my personal preference to see some asymmetry and randomness in a design like this. It's ethereal and just like the cosmos, it's all over the place. I tried to scatter my colors and it sort of worked.

The only other thing I noticed while I was doing this was how unlike a galaxy it looked really until I put the glitter coat on. I didn't want to get my hands messy with the toothbrush splatter technique although it does look awesome like that. So I went with the easy glitter method. But once I put that glitter on, it just BAM! looked like the galaxy. (I think I was channeling Alexis Mateo there...) I even got these odd clumpy polish circles from the sponge dabbing but it worked out fine!

Oh.. another note. I started with a wedge makeup sponge with perfect cut edges. By the end, I'd torn it into smaller pieces (like in Coewless's tutorial) and put the paint on the torn parts to sponge on. Doing that gave a nicer more random sponging pattern.

I REALLY DO love this style. I keep looking at my nails (dangerous while driving) and thinking to myself that it really does look like images of the galaxy on my nails.


Polishes:
  • NYX Girls - Robotic
  • Orly - It's up to Blue
  • China Glaze - Electric Beat
  • China Glaze - Re-Fresh Mint
  • Essie - Castaway
  • Color Club - Worth the Risque
  • China Glaze - Fairy Tale
  • Seche Vite Top Coat
  •  
Tutorials and Posts about Galaxy Nails:

    Tuesday, February 16, 2010

    silver and pink gradient


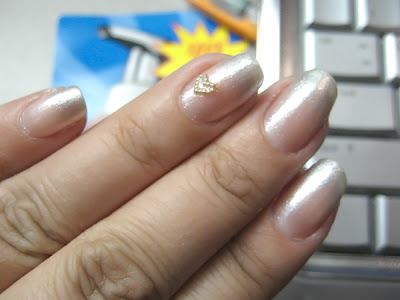
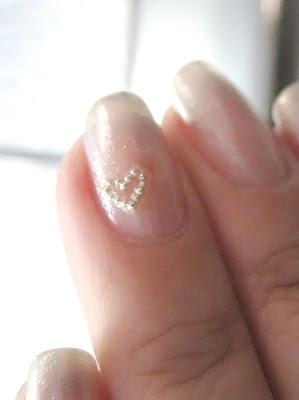
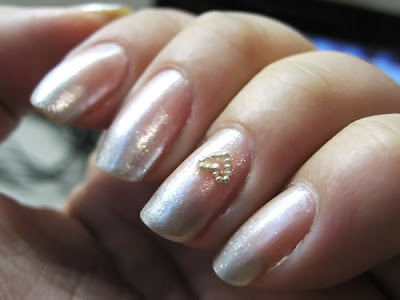
    This one was so subtle in color that I was afraid it'd be impossible to see in photos. I think you can see the gradient, but I guess the naked eye view is much better, in my opinion.

    The silver gradient was made using a nice translucent silver color (Out Of This World) I picked up from Walgreens :) (Sinful Colors polishes are around $2!). I found a gal who swatched it in her blog: laquerlaine - towards the end of the entry. I did read in laquerlaine's entry that Sinful Colors' formula isn't good. Well.. it's $2 so that's to be expected I guess.. But on the other hand, this polish was perfect for what I wanted to do. Granted, I didn't plan on making the polish to appear 100% opaque so it worked out just fine for what I had in mind. Another comment was that it chipped immediately. In total, there were 8 thin coats of polish on my tips by the time I finished.. and I kept the polish on for an entire week or more without chipping or barely even a worn corner. I'm just in the habit of changing my polish/pattern around once a week. This set did really well for me. (Can I get off my soapbox now?)

    I hardly ever use bullion b/c to be honest, it's a pain in the arse to handle. It's tiny and you need to be patient enough to push them around to suit your desired shape. But it was cute for this and I figured 1 heart on each hand wasn't going to kill me :P

    ♥ duration: 40 mins

    ♥ colors/steps:
    ▪ Orly Bonder
    ▪ base color: OPI's Tutti Frutti Tonga + Winmax Diamond Nail Enamel #7 (pink diamond)
    ▪ tip gradient color: Sinful Colors' Out Of This World (4 thin, gradual coats) + Winmax Nail French #5 (french silver)
    ▪ Accessories: silver bullion from Vietnam. Don't ask me where I got those.. (about 5 yrs ago, my parents went back to VN and I asked them to just find some fun nail things and that's one of the items they returned with).
    ▪ Seche Vite on top

    more photos:


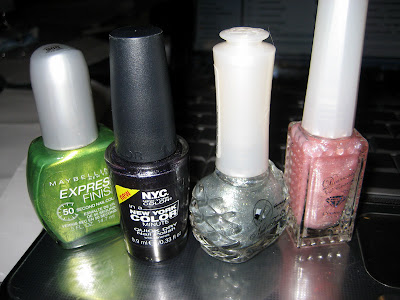
    below is a photo of the polishes I'd bought a few months ago. The pink on the far right is one of the base colors I used. And the silver (2nd from the right) is the last coat I used over the silver gradient.