Showing posts with label cute. Show all posts

Thursday, March 11, 2010

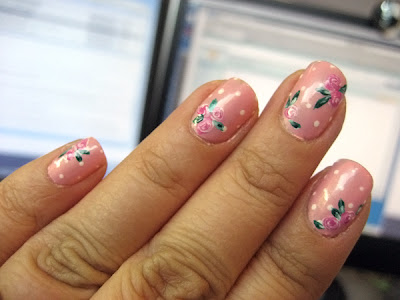
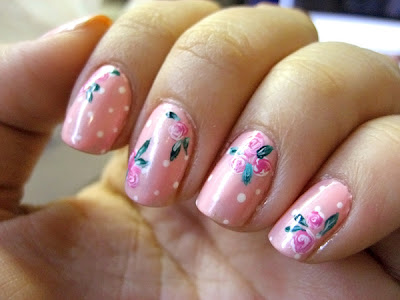
swirled roses v 1.1


Just like version 1.0 but with a bit of extra fun ^_^

♥ duration: 35 mins (2 episodes of Azumanga Daioh)

♥ colors/steps for polish:
▪ Orly Bonder
▪ base color: OPI's Italian Love Affair
▪ 2nd color over base coat: OPI's I'll Take The Cake (to soften the color)
▪ used small dotting tool to make evenly spaced white polka dot pattern

♥ colors/steps for flowers:
▪ reference post from swirled roses 1.0

Thursday, February 4, 2010

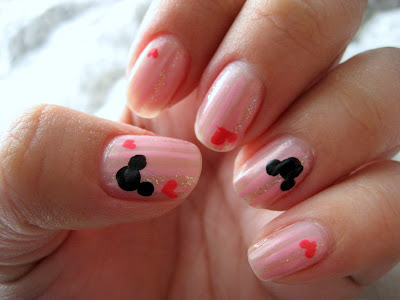
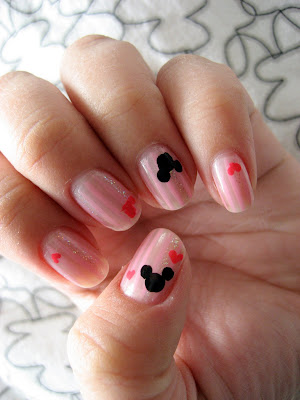
Disneyland is cute


See? Cutesy, huh?

I went with my honey to Disneyland a bit after Christmas. Good fun! There is something completely magical about Disneyland during the holidays. *eyes sparkle* ^_^

♥ duration: 30 mins

♥ colors/steps:
▪ Orly Bonder
▪ base color: OPI's Tutti Frutti Tonga
▪ light pink striper by Art Club
▪ randomly placed irridescent glitter stripes (Art Club) in between light pink stripes.
▪ brighter pink/orange striper polish from Art Club used with dotting tool to make hearts.
▪ Orly Liquid Vinyl polish used with dotting tool to make Mickeys
▪ top coat: Seche Vite

and 1 more photo:

Monday, December 7, 2009

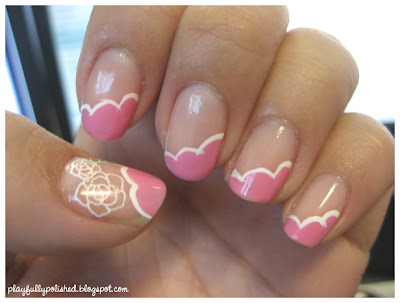
pink scallops - Nov 4, 2009

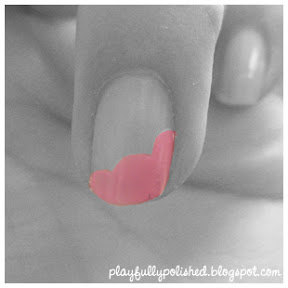
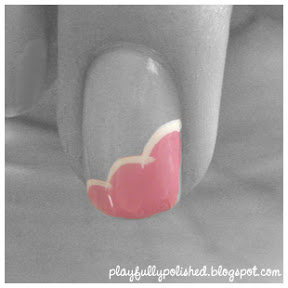
Got the idea for this one out of a Nail Up Mag. It was made to be a light blue sky (base color) and white scalloping to look like clouds. It was cute. :D I was still in pink mode when I did this back in November. :P


♥ duration:
25 mins (really simple, really quick, and super cute)


♥ colors/steps:

Orly Bonder base coat, Essie Castaway (pink tips), Kiss white striper, stain glass style nail seals purchased through Rakuten, a nude polish from Orly (label came off) as the base to make my nails look clean, and Seche Vite for top coat.

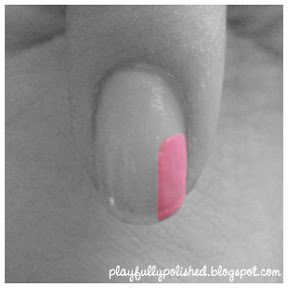
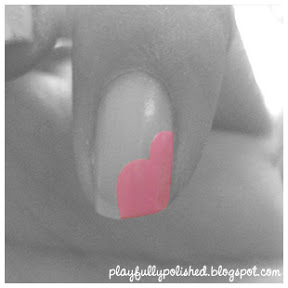
Below are the steps I took:

Monday, September 21, 2009

black and pink argyle

[ backlog May 21, 2009 ]

So I thought I'd mix it up by NOT posting a french manicure-ish style. As I was looking at which backlogged nail set to post, I realized about 80% of my styles are french manicure-like. I think it's because I can wear super bright colors in small amounts that way. :)

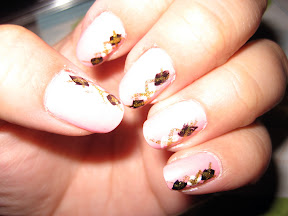
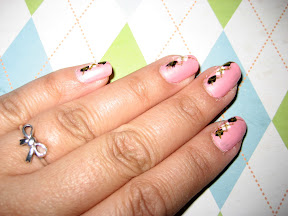
So this set was inspired by a set I saw in a previous Nail Up Magazine. I lent them to Marissa so I don't have it on me. But it's the one before the 30th anniversary one and it's full of argyle and plaid styles. Super cute!! The one I saw in the mag was base colored yellow with pink and white argyle, I think. But I like baby pink with black and white :D so that's what I did!


duration: 45 mins (the diamonds took a while.. I need to find a better way to do them)

notes:
▪ I liked this one a lot b/c of the color combo
▪ I don't remember what the base color is! It's a pale pink but I think I mixed 2 colors. or put one deeper pink as a primary color coat then put a ligher/frostier pink on top... maybe? haha~ but I like that you can use pretty much any color as the base color and still match a black and white argyle design :D

colors/steps:
▪ 1 coat Orly Bonder
▪ 2 coats of a baby pink polish
▪ I used a black and a white striper (by Kiss) to paint the diamonds. Make them small (~2-3mm in height) so you can fit 3 top to bottom without running out of room on the nail. But really, size judgement is up to you (and it depends on how much room you have on your nail).
▪ Then I used a gold glitter striper (by Kiss) to make the other lines. I basically drew Xs crossing through the center of the diamond and make the ends of the Xs meet as you draw them. Those lines should also run parallel/perpendicular to the diamonds themselves.
▪ 1 top coat of Orly Won't Chip (not my favorite, but that's what I used").

Wednesday, September 16, 2009

striped & strawberry-d

I really wanted to use my strawberry nail seals so I finally thought of a way (in my head) that would be pretty cute and creative-ish. I just wasn't sure how it'd turn out... and believe me, I've had those days when I was coming up with designs in my head that I just couldn't get done on my nails. they'd always turn up not quite like I imagined.. but I really like this set. (click on photos to enlarge)


duration: 45 mins (2 episodes of Nadesico)

notes:
▪ Love this one. I was thinking I'd do the stripes in white but I thought it might be too much contrast.. grey pin stripes would be nice too, I think :D
▪ Parts of the nail seal curled up a bit after applying a clear coat but I touched that up by applying a teeny bit of Orly Bonder where it was lifting and pressing it down with tweezers while it was tacky. I also used nail clippers to trim the clear bits of nail seal that were flipping up (especially between the strawberries).

colors/steps:
▪ 1 coat Orly Bonder
▪ 3 thin coats OPI I'll Take The Cake
▪ Applied Color Club Pastel Pink striper starting from the middle of the nail and spacing the stripes about 2mm apart until there wasn't room left on my nail.
▪ Apply Pa Nail Collective Nail Seals (strawberries & bees - peta22)
▪ 1 stripe of Art Club crystal glitter striper randomly on each nail between 2 pink stripes.
▪ Set 5ss Light Rose Swarovski Rhinestone on my nail using Orly Bonder as an adhesive.
▪ Fixed lifting corners with Orly Bonder and nail clippers to trim excessive parts.
▪ 2 final coats of Seche Vite

Sunday, September 13, 2009

first nail posting

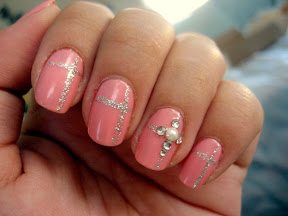
Inspired by a set seen in Vol. 30 Anniversary ed. of Nail Up Magazine that I picked up from my local Kinokuniya. I'm a big fan of this magazine. They're great at explaining how to do things. Generally, I find that the styles are excessively decorated (as if there's such a thing!) and when I do my version, I tend to tone down the design while attempting to maintain the cuteness of a nail set.

Anyway, the article I found this set in was about "couples nails" - like the girl would have her own girly set, then the guy would have 1 nail done to match. It's actually a cute idea, I think.. but good luck finding a man that's willing to wear sparklies on his nails! (>_<)

Here it is, my first official nail blog nail image post & description to follow:
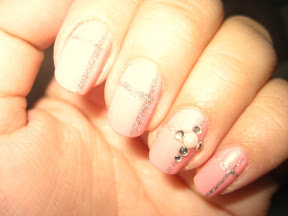
♥ duration:
30 mins (including drying in between coats)

♥ notes about the look: sweet and elegant. the original design calls for a bright pink 7ss rhinestone in the center of the rhinestone set. I placed a pearl there instead. (because I didn't have a bright pink gem that size)

♥ colors/steps:
▪ Orly Bonder base coat
▪ mixed NailiteInc's Peach Shnapps, OPI's Royal Flush Blush (pearl pink), & OPI's Bride's Bouquet (creme white) all in the Peach Schnapps bottle since it was about 60% full. Applied 2 coats.
▪ Kiss silver striper
10ss Swarovski hot fix pearls and 5ss/6ss crystal rhinestones from VN that my friends brought home for me.
▪ 2 coats of Sally Hansen Diamond Strength in Flawless (it was on sale at Walgreens) to make the glitter striper feel smooth.
▪ 1 final coat of Seche Vite

Hope this is good enough for a first real post (*^▽^*) time to sleep~ nitenite!

edit:
@1:21am omigosh.. haha. I need to leave this thing alone! BUT~ I did get the photo slide show going and added a blog roll :D go mi ^_^~♥